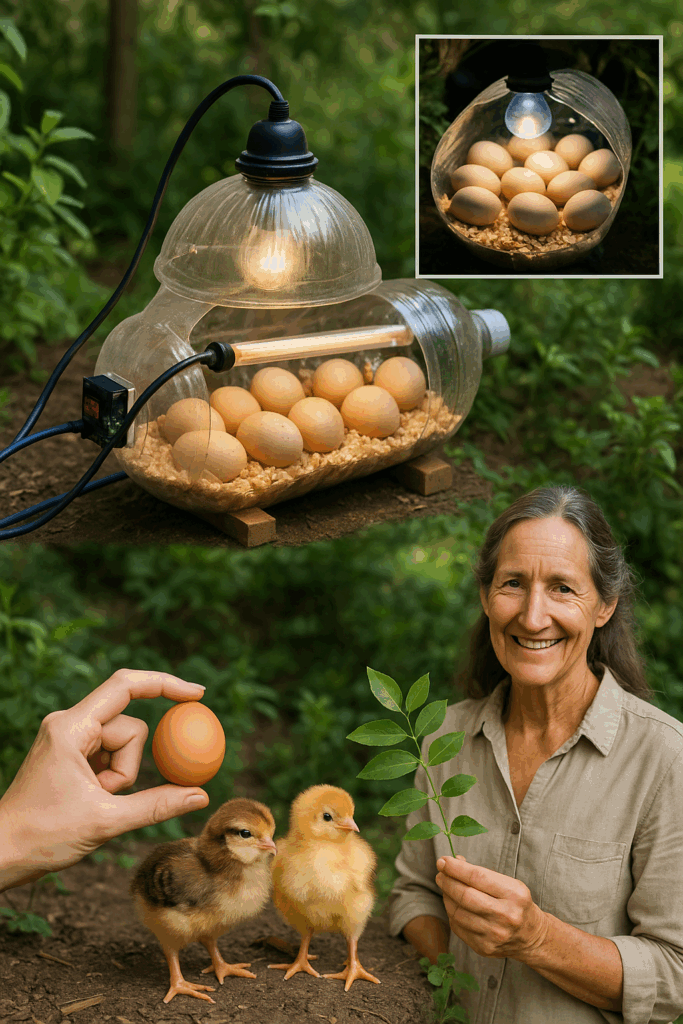
✨ Imagine creating life from a simple plastic bottle and a little bit of care. No fancy incubators, no expensive equipment—just a few everyday items and your own hands bringing the miracle of hatching to life. If you have ever dreamed of starting your own flock or simply witnessing one of nature’s most beautiful processes, this homemade incubator method is your perfect starting point.
Here’s everything you need to know to create a working, no-cost incubator right at home—designed to be simple, effective, and beginner-friendly.
🌱 Why Build Your Own Incubator
Building a DIY incubator is about more than saving money. It gives you full control over the environment your eggs develop in, deepens your connection to the natural process, and provides an incredible sense of accomplishment. Whether you want to hatch chickens, ducks, or quail, this method allows you to start small and learn as you go.
🛒 Materials You’ll Need
- One large clear plastic bottle (a 2-liter soda bottle works best)
- Sharp scissors or a utility knife
- Small LED light or low-wattage bulb for gentle warmth
- Tape (duct tape or electrical tape)
- Thermometer (optional but recommended)
- Soft cloth or paper towels
- Small open container or jar lid for water
- Fertile eggs ready for incubation
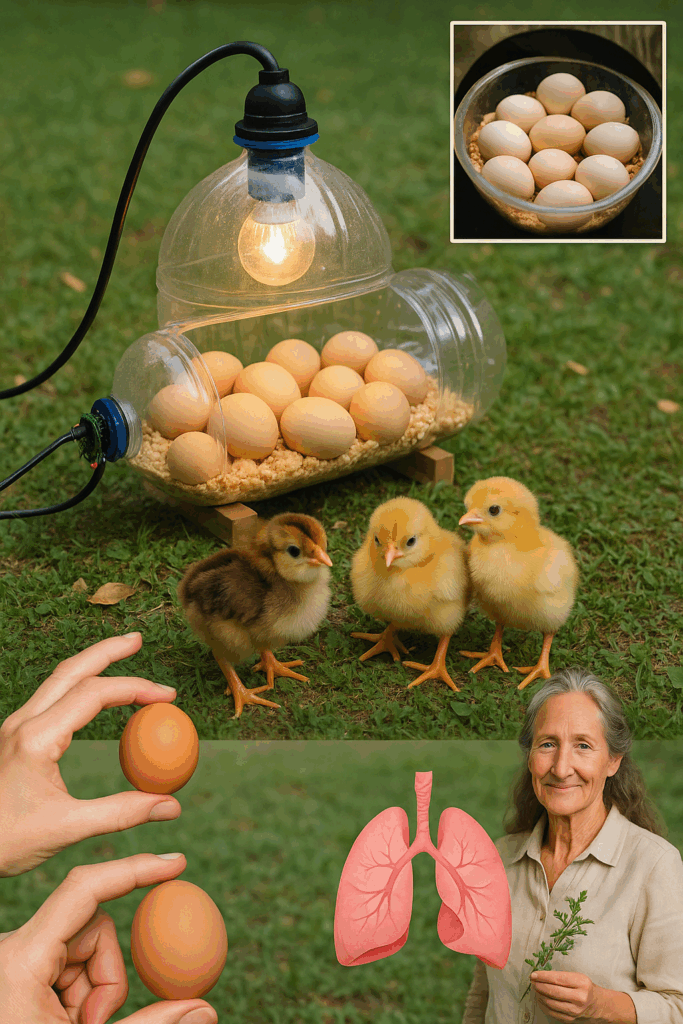
🔪 Step 1: Prepare Your Bottle
Use sharp scissors or a knife to carefully cut the plastic bottle about two-thirds up from the bottom. This will leave you with a larger base and a smaller cap section. Keep the cap on but poke several small holes around the neck for proper ventilation.
🌡️ Step 2: Create a Heat Source
Position a small LED light or low-watt bulb inside the larger bottom section. Place it to the side, not directly under the eggs. Secure it with tape to prevent movement. Choose a light that produces gentle, steady warmth. Avoid high-watt bulbs, which can overheat the incubator quickly.
💧 Step 3: Add Humidity
Place a small, open container of water inside the bottle. This is critical for maintaining humidity levels, which are essential for successful embryo development. Top off the water daily to ensure consistent moisture in the air.
🥚 Step 4: Prepare the Bedding
Line the bottom of the bottle with folded paper towels or soft cloth. This will cushion the eggs and prevent them from rolling around. Space the eggs evenly apart to allow proper air circulation around each one.
🛠️ Step 5: Assemble Your Incubator
Place the top part of the bottle back onto the bottom as a loose-fitting lid. It should trap warmth and humidity inside while allowing some air exchange through the ventilation holes. If needed, tape the sides gently to stabilize the structure, but keep it easy to open for daily checks.
📈 Step 6: Monitor the Environment
Insert a small thermometer inside the incubator to track temperature. Keep the temperature around 99–101°F (37.2–38.3°C) for most poultry eggs. Adjust by lifting the lid slightly to cool it down or insulating the bottle with cloth if it gets too cold. Maintaining steady warmth is critical for healthy embryo development.
🔄 Step 7: Turn the Eggs Regularly
Turn the eggs at least 3–4 times a day. This prevents the embryo from sticking to the shell and helps promote even development. A simple pencil mark on one side of each egg can help you keep track of turning.
⏳ Step 8: Look for Early Signs of Life
Around 7–10 days in, use a small flashlight to candle the eggs. In a dark room, shine the light gently against the shell. If you see visible veins or slight movements inside, it’s a sign that life is growing strong within your homemade incubator.
🎉 Step 9: Prepare for Hatching
About 2–3 days before the expected hatch date, stop turning the eggs. Boost humidity by adding another small water container or lightly misting the bedding. This will soften the eggshells and make it easier for the chicks to break free. Be patient and allow the hatching process to happen naturally without interference unless absolutely necessary.
🌟 Tips for Success
🌡️ Keep the incubator in a room with stable temperature and no strong drafts
💧 Check and refill the water container daily to maintain proper humidity
🖐️ Handle the eggs with clean hands and minimal disturbance
🛠️ Adjust the light source gently if temperatures swing too much
🔥 Common Mistakes to Avoid
- Placing the light too close to the eggs, causing overheating
- Letting the humidity drop too low, leading to hard, dry shells
- Forgetting to turn the eggs during early development
- Ignoring daily water refills, leading to dehydration inside the egg
💬 The Magic of DIY Hatching
There is something truly awe-inspiring about watching life begin through your own careful efforts. The sight of a chick breaking free from its shell, nurtured by the warmth and care you provided, creates a deep and lasting sense of wonder. It’s a reminder that even with the simplest tools—a bottle, a light, a little water—you can be part of something extraordinary.
🌿 Conclusion: Start Your Journey Today
Creating a no-cost home incubator with a plastic bottle is not just a project; it’s an experience. It teaches patience, responsibility, and the incredible rewards of working with nature. Whether you’re starting a backyard farm, nurturing a school project, or simply exploring life’s magic, this DIY incubator opens the door to unforgettable moments.
🥚 Grab a plastic bottle, gather your supplies, and get ready to witness one of the most beautiful miracles right at home. The first step toward new life is now in your hands!